avigation, editing, development using terminal and zsh . But recently due to unforeseen updates, my bios was messed up big time which has led me unable to install Linux for the time being. But the work and learning never stops and nor shall I ! ☺ I don’t hate windows but it’s definitely not my first choice for development and coding after discovering Linux.🤭
But Thanks to WSL, windows terminal, and the beautiful zsh .I can get that Linux experience on windows!
So this is just a blog post on how I customized my terminal on windows 10 using wsl, windows terminal,zsh, and many more fun plugins which I use on my Linux as well as windows for development(work or home).
What is wsl?
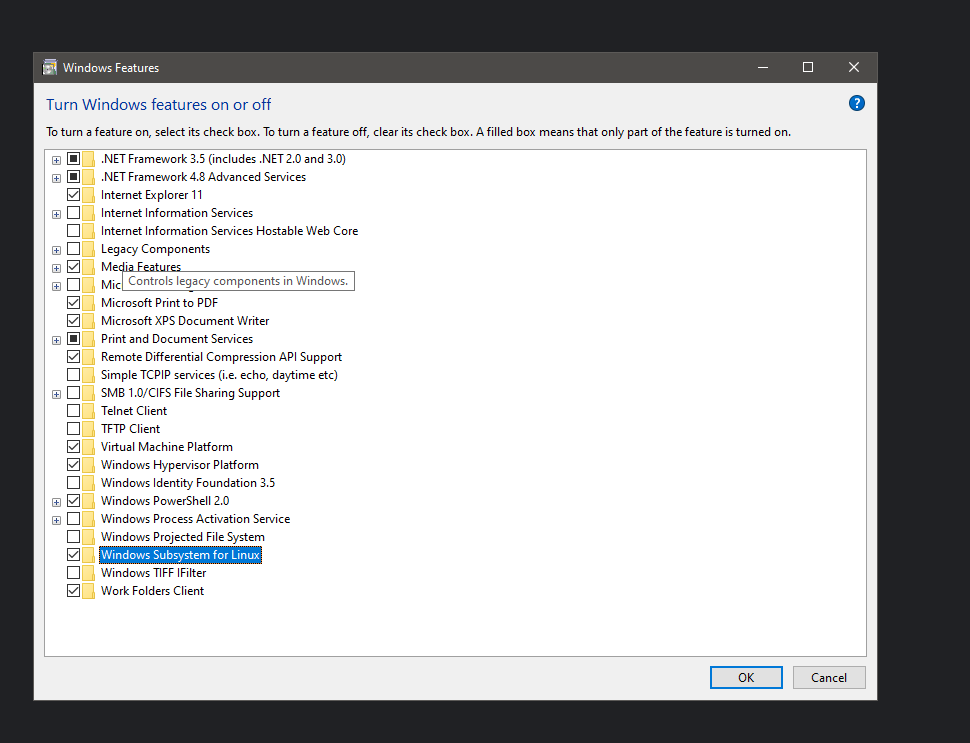
It stands for windows subsystem for Linux and it’s a feature of Windows that allows developers to run Linux file systems,command-line tools etc directly on windows!(Goodbye painful windows mouse navigation) First, you need the wsl feature on windows 10 by going to Start ->Type windows feature on search and below checkbox should be checked for enabling windows subsystem for Linux.
 Now you need to install wsl which you can by going
 Start-> Microsoft store ->type ubuntu.Im installing Ubuntu wsl since I’m familiar with it you can also change distros. I’m also installing another app called windows terminal because it’s much better in terms of ui to me as compared to Ubuntu terminal.This is optional.
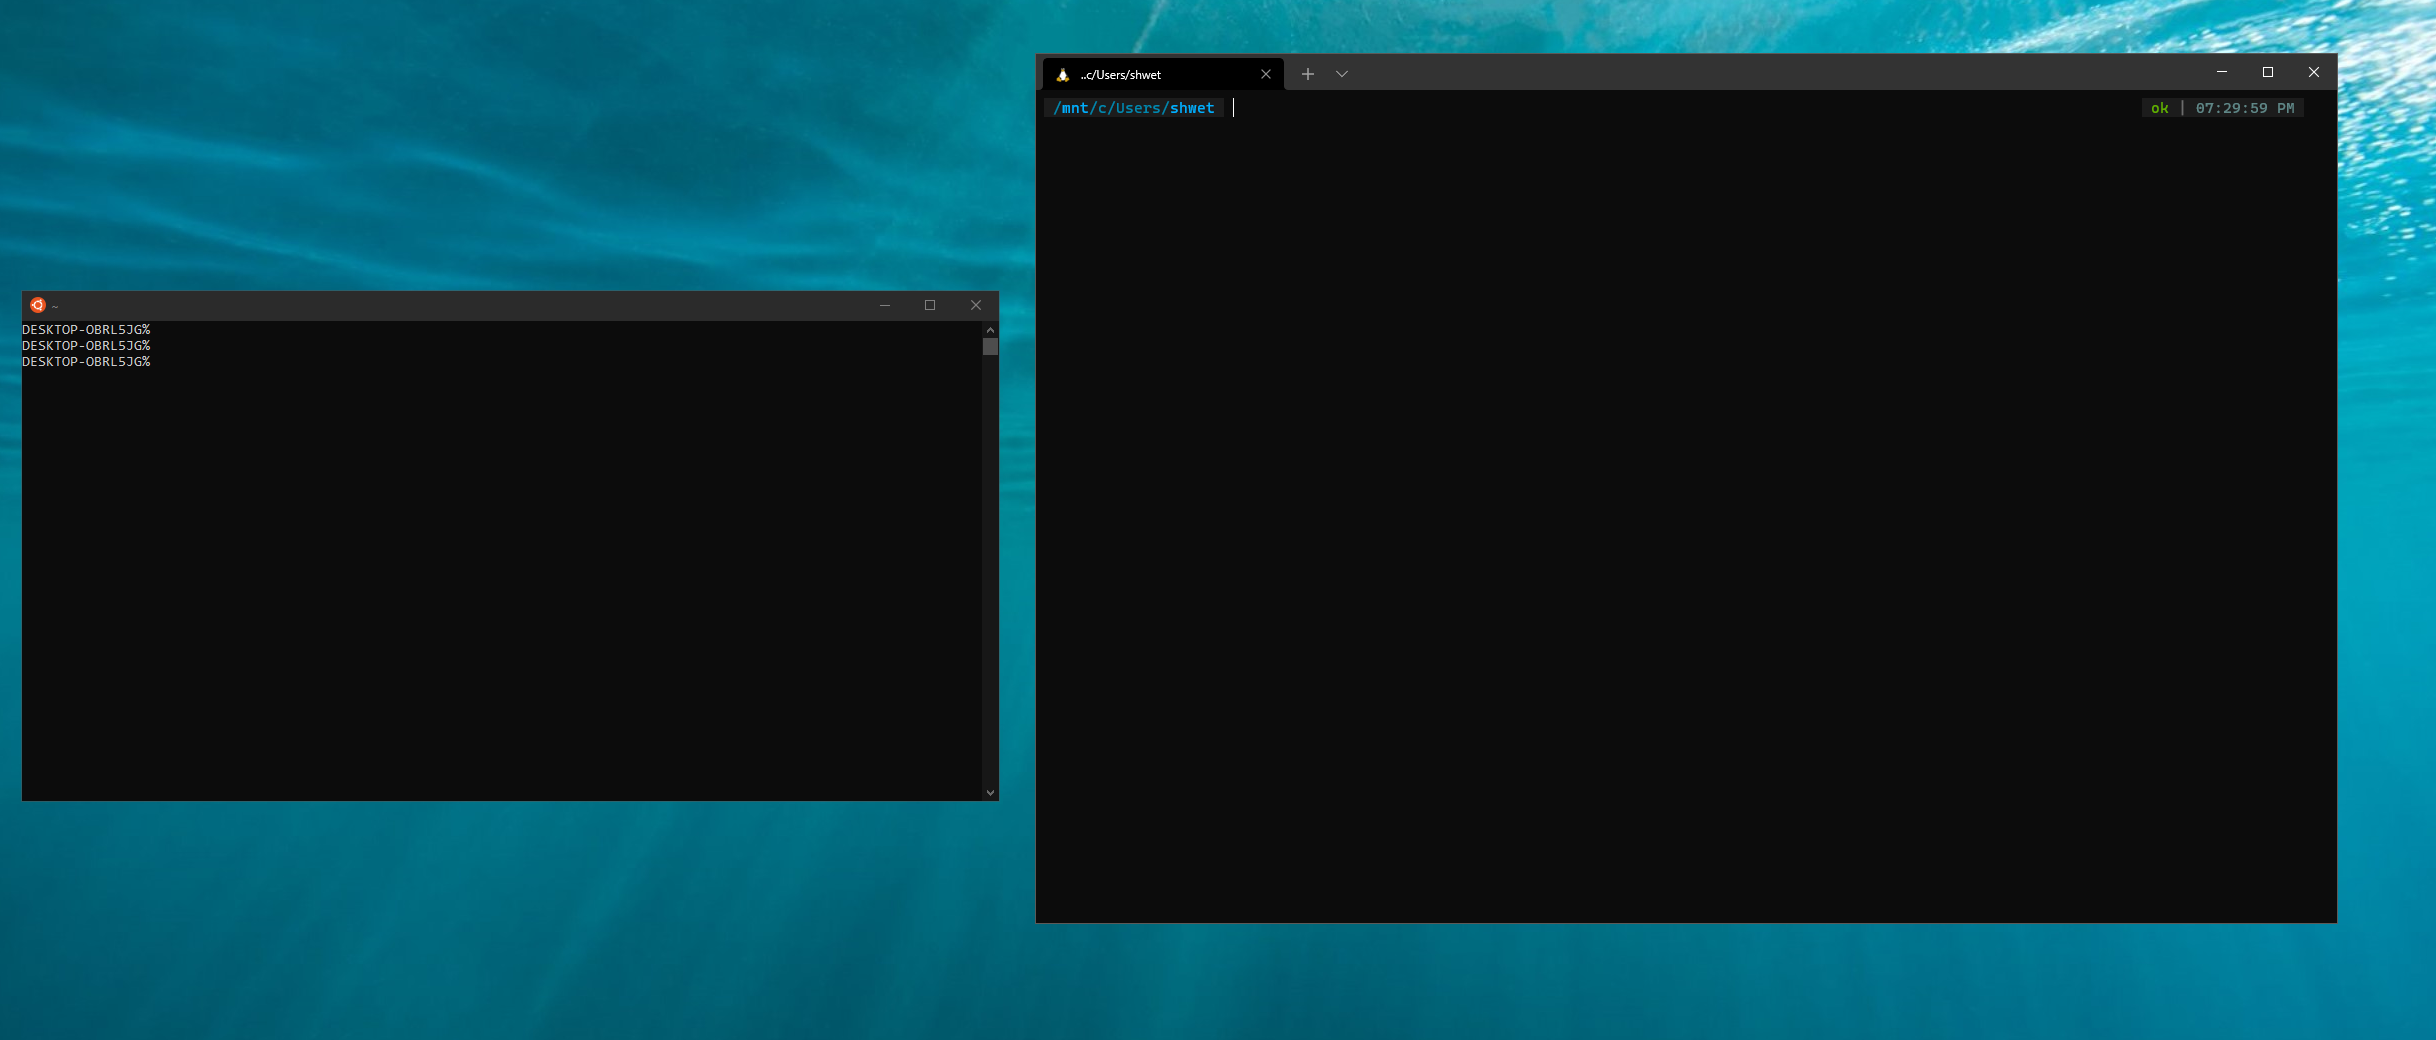 At this point, it’s your choice whether you want to continue with the Ubuntu terminal or use the windows terminal.If you decide with the former,skip the next para and if you decide with the latter then you need to set windows terminal as your default shell.
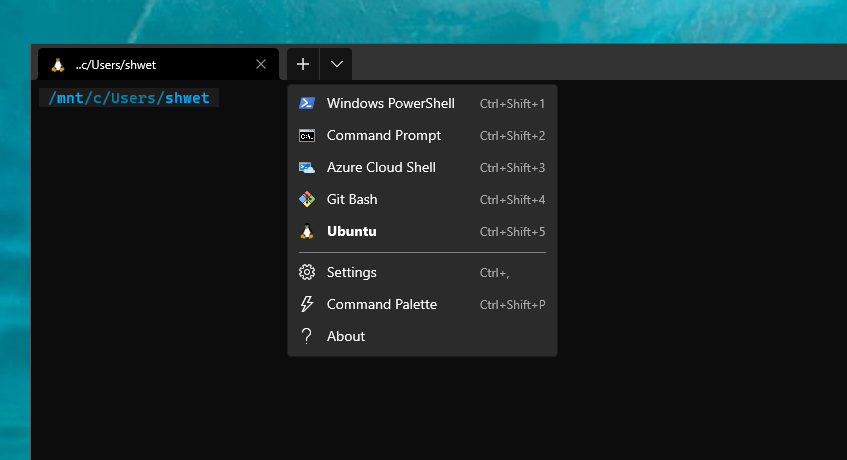
Now by default windows terminal opens the power shell, to set to Ubuntu
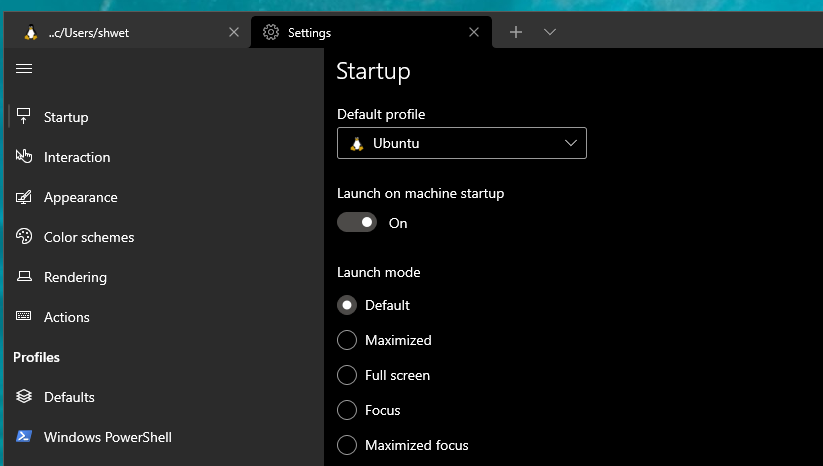 Go to settings as shown below
Now you have a Ubuntu shell that has bash. I personally use zsh with OhMyZsh for my work for that beautiful productivity. Using OhMyZsh features like navigating without using cd, usage of ll, easier tab-click based navigation, and much more!
Note that zsh and OhMyZsh are different. When you install OhMyZsh, many plugins come with it for your rescue! So to install zsh. Update the libraries first then install zsh.
sudo apt-get install update
sudo apt install -y zsh
Then Install ohmy zsh
sh -c "$(curl -fsSL https://raw.githubusercontent.com/ohmyzsh/ohmyzsh/master/tools/install.sh)"
Now your previous~/.zshrc config will be replaced by ohmyzsh To customize the shell next install powerlevel10k.
git clone - depth=1 https://github.com/romkatv/powerlevel10k.git ${ZSH_CUSTOM:-$HOME/.oh-my-zsh/custom}/themes/powerlevel10k
This command clones the repo and now go to your ~/.zshrc and set the theme as power level 10k And then
source ~/ .zshrc
Note: To reflect every change you make, do source ~/.zshrc in the terminal. And then this will give you a set of options to configure which you can decide for your customization.
My favourite plugins
I use these plugins daily and they make my life super smooth !
Fzf
It’s a fuzzy finder command-line tool that lets your fuzzy find anything (files directories git branches you name it )across file system. You can use ti write your custom fuzzy find scripts to find anything.I have posted a link if my current config and aliases for reference. Clone the repo from any directory and just run the install script.
git clone - depth 1 https://github.com/junegunn/fzf.git ~/.fzf
~/.fzf/install
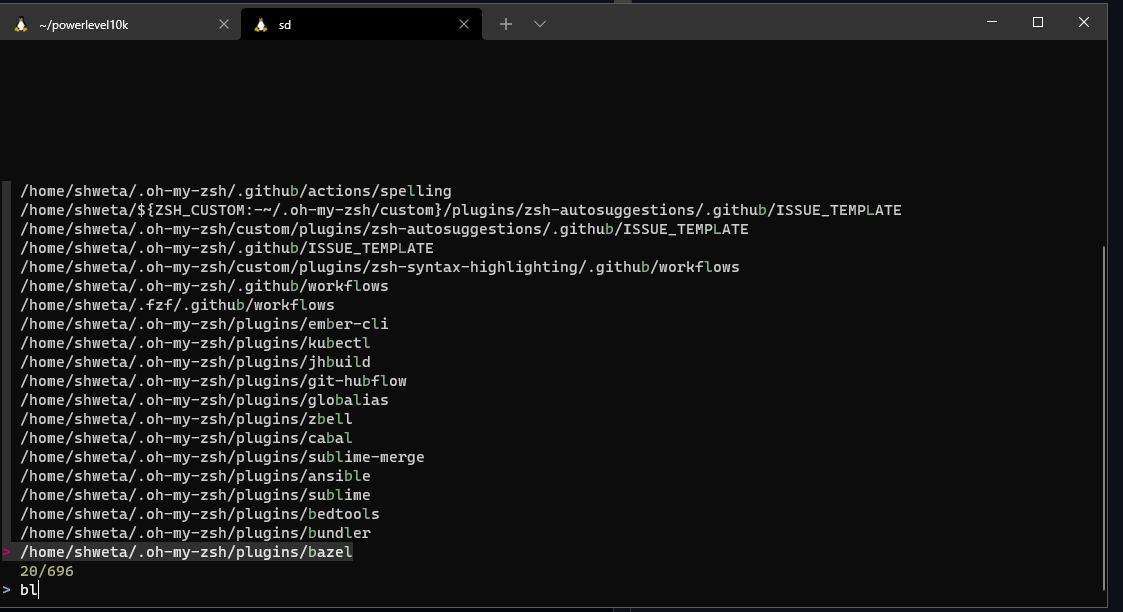 Here is a small example of small WIP config for reference.
Zsh Auto-suggestions
This one Autocompletes while you type a command.This is useful especially when you type commands which you use daily but need to to try multiple times such as navigating and printing log at a specific long location. Git Clone the zsh-autocomplete plugin in the OhMyZsh plugin folder.
$ sudo git clone https://github.com/zsh-users/zsh-autosuggestions ${ZSH_CUSTOM:-~/.oh-my-zsh/custom}/plugins/zsh-autosuggestions
Once that is done, add the plugin in the ~/.zshrc file’s plugin list.
plugins=(
 …
 zsh-autosuggestions
)

Zsh Syntax highlighting
This one automatically highlights zsh commands as you type. This saves a lot of typing on my part. Git Clone the zsh-syntax-highlighting plugin in the OhMyZsh plugin folder.
$ sudo git clone https://github.com/zsh-users/zsh-syntax-highlighting.git ${ZSH_CUSTOM:-~/.oh-my-zsh/custom}/plugins/zsh-syntax-highlighting
And once again add it to the plugins list of the .zshrc file.
plugins=(
 …
 zsh-syntax-highlighting
)
Note: To reflect every change you make, do source ~/.zshrc in the terminal.
Readymade Github Aliases from Oh My Zsh
Usually one defines short github aliases such as g.b forgit branch or g.c for git checkout in ~/.zshrc but you know by using ohMyZsh already has a list of easy git aliases configured. The format is first 2–3 letters of the first letter of the command such as
gb git branch List of local branches
gba git branch -a List of local and remote branches
gcam git commit -am Add all files to stage and commit
gcmsg git commit -m Git commit message
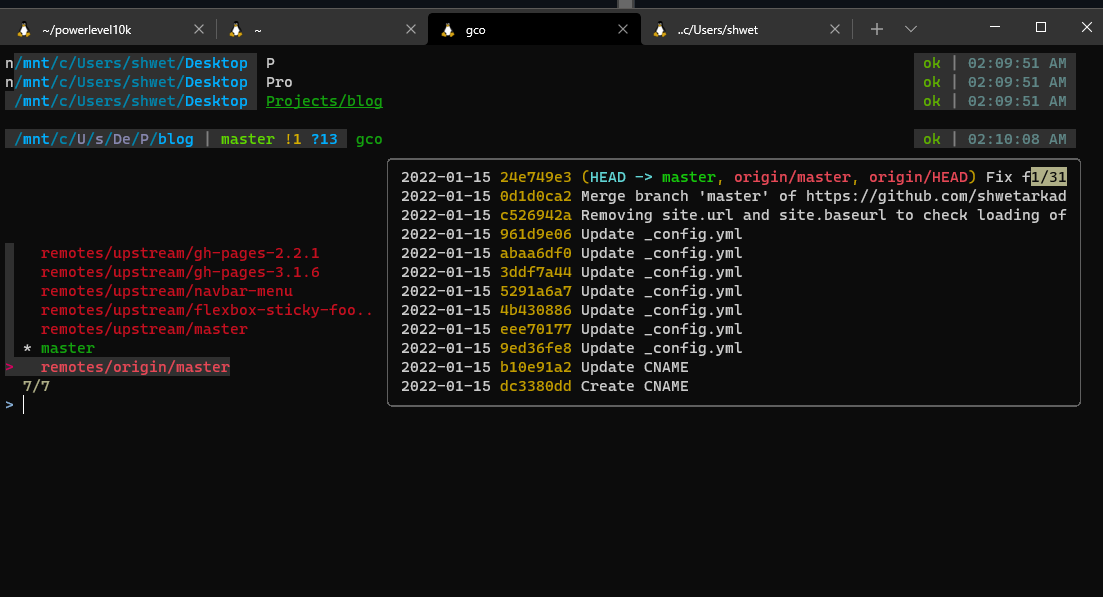
gco git checkout Change branch
gco - git checkout to the previous branch Change branch to the previous one
gd git diff Files differences in staging
gfa git fetch - all - prune Fetch all remote branches, delete branch if upstream is gone
gl git pull Pull from remote
gp git push Push to remote
gpsup git push - set-upstream origin [currentbranch] Set upstream branch
gst git status Local files to commit
I use these git aliases daily and they make working super fun.I recommend going through oh-my-zsh git aliases cheatsheets
That’s all folks! This is my current setup in windows for development and this is still a work in progress that can keep changing but these plugins and zsh are something that has made the experience of using windows quite fun.